where to buy chair rail molding

Home Products Chair Rail Chair rails are practical, as well as decorative and are applied to a wall, anywhere from 24 to 72 inches up from the floor. They were typically specified to protect the wall from scuffs and dents from the backs of chairs, but are now used as beautiful room accents. The chair rail runs along the wall, parallel with the baseboard. Adding a refined decor to any space, it’s the subtle choice that makes a big impact. The chair rail perfectly complements a wainscot design. Then & Now Collectionstable saw or circular saw brad nailer and nails chair-rail and baseboard molding laser level and standard level 1. Measure the walls to be covered, and draw a layout of the room. Indicate the measurements of the walls on your drawing. Use the measurements to help determine how much molding to purchase. 2. Set a laser level to the desired height of the wainscoting. Measure from the laser line down to where the baseboard will fit, based on the height of the wainscoting boards.

3. Mark the wall with the chalk line at the point where the top of the chair rail will sit. 4. Remove your old baseboard. If you are reusing the same baseboard, score the top of it with a utility knife to separate the paint from the wall. This will help prevent the paint from peeling off the baseboard. Use a crowbar to help pull the baseboard off the wall. 5. Many stores sell baseboard that has been precut with notch in the back that allows the wainscoting panel to easily fit in behind it. If you are using the pre-notched baseboard, cut it to size with a miter saw and attach it to the wall with wood glue and a nail gun. Fitting the inside corners of the chair rail together. 6. Cut the wainscoting to fit around the room. Wherever the panels meet along a straight portion of the wall, cut the panels on a 45-degree angle so the pieces will match up to hide the seams. One piece should be cut at a 15-degree angle to the front and the complementary angle on the back. Join pieces in the corners with 45-degree angles.

(Wainscoting panels are often sold with pre-cut angles.) 7. Generously apply carpenter’s glue to the back of each panel and then slide the wainscoting into the notch on the backside of the baseboard. Place the level horizontally and vertically against the first piece of wainscoting to make sure it’s straight and level. When it is level, nail the wainscoting to the wall. (Nail into the studs whenever possible.) 8. Continue with the remaining panels. If there are any electrical or cable outlets or phone jacks exposed, measure and mark the location on the piece of wainscoting to make cutouts. Using a drill with a bit large enough to fit a jigsaw blade, drill a hole on the edge of the area to be removed. Be sure to drill within the mark, then cut around the marked area with a jigsaw, starting in the drilled hole. 9. If you do not have pre-notched baseboard, glue and nail the baseboard molding to the wall. Be sure the baseboard is also cut on an angle to hide the seams. 10. Use glue and the nail gun to fasten the chair-rail molding over the top of the wainscoting.
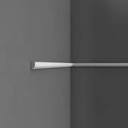
Steps to Installing Chair Rail: Measure each space on the wall where the chair rail will be installed.
chair for sale brisbane Mark the desired distance from the floor to the top of the chair rail (usually 36” to 38”).
cheap table and chair rentals miamiMake the chair rail taller in rooms with higher ceilings.
cost to reupholster living room chairUse a level to check that the marks for each section of chair rail are level.
ghost chair hire south africa Chair rail that meets at inside wall corners can be joined using inside miter cuts or by butting one piece of chair rail against the wall and coping the other piece to it.

Outside miter cuts are used to join two pieces of chair rail that meet at an outside wall corner. Use miter cuts to join two pieces of chair rail together on a long wall. Make the joint occur over a wall stud so it can be nailed securely. Butt the end of chair rail against door and window casing, unless the chair rail protrudes out more than the casing. If the chair rail profile protrudes out further than the door or window casing, miter the protruding molding back at a 45° angle or form a return by mitering the end of the chair rail and attaching a small sliver of molding to it. Use finishing nails and construction adhesive to attach chair rail molding to the walls. Fill any nail holes and caulk gaps at joints. Paint the chair rail to match the color of the trim in the room. Watch this video to find out more. Tips for Cutting Moldings (article) How to Cut and Install Crown Molding (video) Turning Stock Molding into Custom Molding (video)

Danny Lipford: Begin by measuring the spaces where the chair rail is to be installed. Chair rail is usually installed at a height of 36 to 38 inches from the floor, but it’s best to check these marks with a level, in case there are fluctuations in the floor. At the inside corners of the room, you will make an inward facing 45-degree cut to the chair rail so it miters into the rail on the adjoining wall. If the molding profile is thicker than surrounding trim, like door and window molding, you’ll want to create a return in these locations. This means rather than cutting the trim square in this spot, you will make an outside 45-degree mitered cut. Next, make an opposing outside miter cut from a scrap piece of chair rail, and then square cut this piece to the thickness of the chair rail. The resulting sliver of trim will be glued to the end of the rail to cover the end grain and “return” the profile to the wall. The only thing different about polyurethane chair rail is that it requires adhesive in addition to finish nails to secure it.