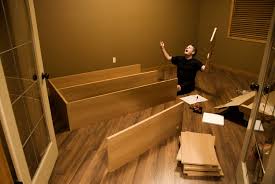
ikea chair bed parts

Sectional Sofas Sleeper Sofas Best Sleeper Sofa Sectionals Sofa That's Bed Couch Best Sofa Sofa Cum Modern Sleeper Sofa Forwards Sofa Bed. Like this design a lot. Much better than the sleeper couch at my parents' house.When it comes to budget furniture, nobody does it better than IKEA. But part of that cost-saving is labor–the labor that you put in to turn that flat-pack box into a piece of furniture. As with any DIY project, ready-to-assemble furniture is an adventure; a composite of tribulations and accomplishment. Recently, after a project that was more tribulation than accomplishment, I wrote down some ideas that would prevent the myriad mistakes I’ve made building IKEA furniture. I applied these recently to a credenza from CB2; lo and behold, I managed to build a solid piece of furniture without breaking it or putting anything on upside down. It was a miracle. To me, this meant that these 10 concepts are more than just IKEA assembly tips–they’re revelations worth shouting from the mountaintops to all future flat-pack builders.
I humbly present to you, righteous assembler, The Ten Commandments of IKEA Furniture. Before you even unbox your furniture, you should physically prepare the area you’ll be working in. You should give yourself enough room that the finished piece could be laid down and you could comfortably walk around every side of it (because, in many cases, that’s exactly how it’s built). Open the box and read the instructions. Make a mental note of any steps that require rotation and ensure you have enough space to do that. Also, unless you’re working on carpet, use a rug (or the box that the furniture came in) to protect both the floor and the furniture. The first section of an IKEA instruction manual includes a summary of the pieces that should be included in the box. First, open up the hardware bags and organize them as you count them. You can use small bowls or get creative–ice cube trays, egg cartons, muffin tins, or a simple loop of tape are recommended in this Reddit post.

You’ll want to do the same with the furniture pieces to familiarize yourself with each piece. Is this the top or the bottom of the dresser? Are they identical and interchangeable, or are they actually slightly different? The reason we recommend inventorying hardware and fasteners first is because these are the most likely to get left out. Missing pieces are a common IKEA woe, so make sure everything is there. If it’s not, find the six-digit part number in the instructions.
waiting room chairs gold coastYou have a few options to get the missing piece: you can visit a nearby store’s “missing a part” section, call your local store (ask for the relevant department rather than going through the operator), or fill out this online request form and get the piece mailed to you.
salon chairs for rent nyc
IKEA often recommends (wordlessly via a gender-neutral stick figure) the use of simple screwdrivers, hammers, and the included Allen keys to construct its pieces, but you can make the job faster and easier if you bring some of your own tools. For easier assembly of all IKEA furniture, this is what I recommend you bring: Let’s face it: IKEA furniture isn’t as sturdy as your grandmother’s antiques. A common mistake is to try to compensate by cranking down on screws or bolts.
tub chair sale australiaBut most IKEA furniture is made from medium density fiberboard (MDF), which is why it’s not as sturdy as nana’s side tables, and tightening past the boundaries of the pre-drilled holes will cause the fiberboard to split.
ikea dining chair padsThis results in a looser connection that could lead to an irreparably wobbly piece.
where to buy chair glides
When using Allen keys, don’t torque the bolt in with your full body weight. If you’re using a manual screwdriver, tighten screws until they are flush with the wood and no more. You can tell when a screw or bolt starts to get slightly more difficult to turn–stop there or you’re risking cracking the fiberboard. If you’re using a powered drill, make sure to turn the torque down to the lowest setting. Post updated by SpareFoot, 3/20/2017.
hair salon chairs in indiaNew IKEA POANG Armchair with Alme Black Chair cushion See more like this
bride and groom wedding chairs for rentIKEA Customer Gives Bad Review After His Man Parts Get Stuck In A Stool
egg chair for sale ebay Like & Follow Us On Facebook!
bean bag chair in the night garden
Prev Article Next Article This Project is now being Updated to Include the S Series Model The S Series Includes easy assembly of the frame and wiring with addition of a heat bed, BL Touch Probe for auto bed levelling/tramming and an updated ui for the mks touchscreen Being interested in 3D printers since 2011 after purchasing a BFB 3D Touch (Now 3D Systems with the latest model being the Cube Pro costing over £2000) I wanted to build a stable Large build platform 3D Printer for a fraction of the price. Many Enthusiast's entries into the 3D printer market comes from the purchase of the Prusa i3 kit and in keeping with the good work of the Joseph Prusa design I felt it would be great if the design could be simple. One of the many drawbacks I noticed was the overall finished look of the DIY kits; i set upon the task of creating a product that not only was affordable and easy to build but one which had style and form a look in keeping with the futuristic possibilities 3D printing brings.

Step 1: About the Printtable Inspiration to create a 3D printer from an Ikea Lack table simply came from the fact that my BFB 3D touch printer had been placed on top of a lack table for the last 5 years. Whilst the lack table absorbed the vibration and forces applied from 5 years of printing the table showed no obvious signs of wear or distortion. Further investigation of the Lack range fuelled my ambition by the world having easy access to IKEA furniture chain, resulting in a worldwide common platform in which to build the range of large format printers. It’s this Format which will bring the greatest benefits to Hackers, Builders and 3D printing enthusiasts all around the world encouraging people to build, share and adapt the design creating an entire collaboration of adaptions, improvement's and opportunities. The Printtable project could not of been possible without the amazing help of my family, Louise (my daughter) for burning the candles at both ends creating fantastic renders, schematics for the build instructions and endless contributions to the design, Louise's husband Steve (Son-in Law) who spent hours on social media and websites promoting the Printtable project.

My son James who spent most of his spare time just after finishing exams at university to create the website and endless hours (many through the night)piecing together 100s Gb of video footage to create the You Tube follow and build videos (if I had presented before I am sure without all the mistakes we could of done them quicker, Sorry my bad) and finally my wife who had the misfortune of listening to all the debates a family would naturally have when a project means so much to them and the missed nights of snuggling up before we sleep. For them I want to give special thanks and this personal thank you, your help and support is appreciated and with an amazing family we can create amazing things. Thanks and love you all. Thanks for reading and have fun creating your own Printtable. Step 2: How to Access Information? / Creating a Community With-in the site will be links to the you tube channel as well as additional information about the build, we will be giving away some of the build parts such as acrylic panel sets, rods, wiring and starter kits to builders in competitions and will also provide a one stop shop for all the printable components and upgrades.

A forum for all to assist each other in all thing Printtable and 3d printing. News articles, tips and tricks and expanding on the printtable plans with help of the community for the future. Step 3: Parts Required This video is the first step (same as above) in a easy to follow step by step guide on preparing the Ikea Lack table ready for its amazing transformation into an attractive large platform 3D printer. / select country and search for LACK Table size 55x55 cm ) or find a local 3D Hubber to print them for you at 3D Hubs Please see attached spreadsheet for parts required. Step 4: STL Files for Download Download the STL files. Some parts are printed in two halves and require placing together and a hot solder gun run along the joint to weld them together. Please refer to schematic drawings and pre thread/drill holes which require fixing with M3/M4/M5 bolts or Grub Screws. 8mm and 10mm rod holes may want drilling out and it is recommended to use a masonry drill bit fro this purpose.

Note X Axis Puller wheel Holder as a smaller centre than Y Axis Pulley Holders. Supports have been marked with position to be placed ensure the wider lip is positioned against the table legs and the thinner lip against the table top. Templates for Acrylic/Polycarbonate parts Including cutting template to be printed and used to cut holes in the print bed. Step 6: Assembly Drawings and Video Animations These drawings are to help you get familiar with the assembly of the printtable and assist in the naming conventions of the parts. Also included above are short videos showing animations on how the some of the components come together. Step 7: Preparing the IKEA LACK Table Show All Items Okay So lets get to work, Remember take your time and enjoy learning the build, 3D printing is nothing more than a learning process and with my help you will soon have a good understanding of how a 3d printer works and a fully functional printer to empower your creativity.
This video is the (same as above) in a easy to follow step by step guide on preparing the Ikea Lack table ready for its amazing transformation into an attractive large platform 3D printer. All the instructions are included in the video the photos above are a quick reference to remind you of the steps Step 8: Z Motor Mounting Show All Items This video is (same as above) where we cut out and mount the z motor housing. Step 9: Printtable Support Assembly Show All Items This video is (same as above) where we assemble the 4 corner supports. Step 10: Table Top Cutting and Creating the a Sturdy Frame Show All Items This video is (same as above) where we cut out the table top and fasten to create a sturdy frame ready to accept the Printtable components. Step 11: Y Axis Rods and X Carriage Assembly Show All Items This video is (same as above) where we insert the y rods and X carriage. Don't forget to check out the X Assembly Animation in the previous steps as a reminder on how to assemble the X carriage.

Step 12: Printtable Y Axis Drive Rod and Bracket Mount Show All Items This video is (same as above) where we assemble the Y Axis drive rods. Step 13: Y Axis Pulley Assembly Show All Items This video is (same as above) where we attach the Y Axis pulley brackets. Step 14: Printtable Y Axis GT2 Belt Assembly Show All Items This video is (same as above) where we attach the Y Axis GT2 Belts. Step 15: Printtable Z Axis Rod Mount Assembly Show All Items This video is (same as above) where we attach the Z Rod Mounts Step 16: Printtable Bed and Lead Screw Assembly Show All Items This video is (same as above) where we understand and assemble part of the print bed Step 17: Printtable Bed Frame Mount to Printtable Show All Items This video is (same as above) where we Attach the print bed to the Printtable Step 18: Printtable Print Head Assembly Show All Items This video is (same as above) where we attach the print head mount for the E3D Titan along with The X Axis GT2 Belts

Step 19: Printtable Y Axis Motor Assembly Show All Items This video is (same as above) where we Attach the Y Axis Drive motor Step 20: Printtable E3D Titan and Hot End Show All Items This video is (same as above) where we have already assembled the E3D Titan Extruder instructions can be found at this link. For more information on E3D please visit Step 21: Printtable Endstop and Z Motor Housing Fix Down Show All Items This video is (same as above) where we Attach the End Stops and fasten down the z motor housing.Printtable Ikea Hack Conduit Build Show All Items This video is (same as above) where we Attach Conduit for wiring and print head. Step 23: Printtable Build Platform Using the template provided in the template step cut the print bed from a piece of 12mm plywood. Step 24: Controller Board Wiring This video show the wiring complete and is a guide to assist in wiring up the Printtable MKS Sbase Controller board link takes you to MKS S Base wiki for more information.