wooden rocking chair designs

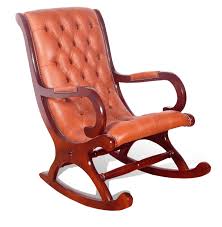
Wooden Rocking Chairs Wooden Chairs Furniture Chairs Design Furniture Furniture Ideas Rockers Woodwork My Grandmother Grandmothers Forward Take a look at this traditional wooden rocking chair & crib combo available at Colonial Classics. This piece of furniture combines both a rocking chair & crib in one.23 Modern Rocking Chair Designs A rocking chair is a type of chair with two curved bands (known as rockers),which contact the floor at only two points, giving the occupant the ability to rock back and forward. This chair design is very comfortable for every age and everybody should have it at home. This rocking chair is good for the new parents too. You can have some much needed rest while enjoying with your child. Many people find rocking chairs soothing because of the gentle motion. There are so many designs of the rock chair, but the most popular is the traditional wooden rock chair. The most comfortable rock chairs are those with cushions. When choosing a rocking chair, comfort should be your first priority.
Other important thing is high quality workmanship and premium components. You need to find the right one that fit your needs and your decor. Rock chairs make perfect cozy to relax in your living room and your porch too. Those chairs are good for reading books, nurse a new baby, or simply for everyday relaxation. Recent posts in Chair2 – 1×2 at 8’ 3 – 1×3 at 8’ 2 – 1×4 at 8’ 1 – 1×6 at 8’ (or use 3/4” plywood, ripped down to 5-1/2” wide) 1-1/4″ Pocket Hole Screws
ladder back chair seat replacement 20 – 1/4” 2” long bolts and 1/4″ nuts
buy rocking chair covers Pocket Hole Plugs – Paint Grade, Pine, Oak – optional
buy plastic stackable chairs
1 – 1×2 at 16” – Backrest Top Frame 2 – 1×2 at 18-1/2” – Backrest Side Frames 2 – 1×3 at 2-1/2” – Armrest Supports 2 – 1×3 at 21” – Backrest Sides 5 – 1×4 at 19” – Backrest Slats 2 – 1×3 at 23” – Seat Sides 2 – 1×2 at 17-1/2” – Seat Front and Seat Back 5 – 1×4 at 19” – Seat Slats 2 – 1×3 at 22” – Armrests 2 – 1×3 at 12-1/4” – Side Frame Tops 4 – 1×3 at 24-1/2” – Side Frame Sides
queen anne chair frames 2 – 1×2 at 19-1/2” – Side Frame Bottoms
power lift chair won't go down 2 – 1×6 at 35” – Rockers
rattan dining chairs online Read through the entire set of instructions and all comments before beginning this project.
bean bag chair home goods
If you print out or save plans, be sure to check in on my site to be sure you have the most up to date set of plans, as I occasionally update things for ease of building or buying. If you are new to building, read through the GETTING STARTED section and other articles found under the BUILD tab in the menu on my site, it has valuable information about how to get started, tools and techniques. If you are unfamiliar with the finishing process, visit my Finishing school for some tips and tricks for painting like a pro and for special finishing practices.
buy office chair delhiUse glue to secure your joints and Consider Painting or Staining individual sections prior to assembling.
office chairs uk kentThis makes the paint application virtually flawless. Coat with a spray on Poly or Wipe on Poly to protect your finish and your piece and it will last for ages.

Adhere to all safety standards and guidelines, and be sure you follow safety protocol throughout your build. If you are unsure about whether you are building safely, run a quick online search for the tool or technique you are using, or contact me via email or post to the forum before you move ahead. My contact info can be found in the menu of my site. / Click on Images to Enlarge Cut the pieces for the Backrest Top Frame and Backrest Side Frames. With the Kreg jig set for 3/4” material, drill pocket holes in each end of the Backrest Top Frame. Assemble as shown with glue and 1-1/4” pocket screws. Cut the pieces for the Armrest Supports, Backrest Sides, and Backrest Slats. Cut the Armrest Supports as shown. Chamfer the top back corner of the Backrest Sides at a 45-degree angle, if desired. You can also “round out” the bottoms of the Backrest Sides as shown. Attach the Backrest Sides to the Backrest Side Frame pieces as shown with glue and 1-1/4” wood screws.
Attach the Armrest Supports to the Backrest Sides as shown with glue and 1-1/4” wood screws. Attach the Backrest Slats to the Backrest Top Frame and Backrest Sides as shown with glue and 1-1/4” wood screws. Cut the pieces for the Seat Sides, Seat Front, and Seat Back. Chamfer the bottom front corner of the Seat Sides at a 45-degree angle, if desired. With the Kreg jig set for 3/4” material, drill pocket holes in each end of the Seat Front and Seat Back. Cut the pieces for the Seat Slats. Attach the Seat Slats to the Seat Front, Seat Sides, and Seat Back as shown with glue and 1-1/4” wood screws. Cut the pieces for the Armrests, Side Frame Tops, Side Frame Sides, and Side Frame Bottoms. You can “round out” the outer corners of the Side Frame Sides as noted to allow for better chair movement. With the Kreg jig set for 3/4” material, drill pocket holes in each end of the Side Frame Tops and Side Frame Bottoms. Next, drill pocket holes in the top end of the Side Frame Sides.
Assemble as shown with glue and 1-1/4” pocket screws. Repeat this step for the other side. Cut the pieces for the Rockers. Draw out the shape as shown and cut out with your jigsaw. Make sure you draw a gentle curve. For this project, we used a radius of 62-1/2” for the Rocker curves. If desired, “round out” the end corners of the Rockers with your jigsaw or sander. Clamp the Rockers to the Side Frame Sides as shown. Using a 1/4” spade bit, drill holes through both of the clamped pieces. Attach the Rockers to the Side Frames Sides as shown with glue and 1/4” bolts and nuts. Once assembled, you can see what part of the Side Frame Sides extend past the Rockers. Use your jigsaw or sander to remove this excess wood. Repeat this process with the other side. Set the Rocking Chair upright. Using clamps, position the Backrest assembly to the Side Frame assemblies as shown. The bottom corner of the Armrest should be flush with the back edge of the Backrest Side and should be set directly on the Armrest Support.