where to buy chair stuffing
Sold by Creative QT and Fulfilled by Amazon. New (1) from $24.95 Stuffed Animal Storage Bean Bag Chair - Premium Canvas - Clean up the Room and Put Those Critters to Work for You! - By Creative QT FREE Shipping on orders over . Stuffed Animal Storage Bean Bag Chair | Perfect Storage Solution For Extra Blankets / Pillows… FREE Shipping on orders over . (Stuffed animals not included) Stuffed Animal Storage Bean Bag Simply fill, zip, and sit down. Make, that mountain of critters start working for you and make your kids room look great. 1: Fill bag with stuffed animals. 3: Are you still reading this? 4: Seriously, just sit on it with your kids and read a book. Don’t just stand there all day reading instructions that are a joke to begin with. Who is Creative QT? Creative QT was founded by husband and wife team Adam and Dana Sue Hinkle. Parents of 5 we strive to create tools to help busy parents succeed in their #1 job… forming our crazy munchkins into awesome people.
Our three product goals are fostering imagination-based play, promoting organization, and facilitating parent/child engagement; cultivating in families more creative quality time (QT). We’re right beside you in the journey of developing kids and we want to help you to continue to be the hero in your kid’s adventures, both real and imaginary. 11.8 x 10 x 1.1 inches 4.9 out of 5 stars #4 in Toys & Games > Kids' Furniture & Room Décor > Kids' Furniture > Chairs & Seats > Bean Bags #666 in Home & Kitchen > Furniture 13.6 ounces (View shipping rates and policies) Stuffed Animal Bean Bag Storage - EXTRA LARGE Childrens Plush Toy Organizer Creative Solution for Kids (XL, Blue) by Buddy Plush Big Joe Bean Bagimal, Unice the UnicornProducts Microsuede Purple Bean Bag Chair for DollsProducts Dinosaurs Blue Bean Bag Chair for Dolls mimish Storage Beanbag - Cotton, Purple 5 star 92% 4 star 6% 3 star 1% 2 star 1% 1 star 0% See all verified purchase reviews Top Customer Reviews Perfect to organize stuffed animals | |

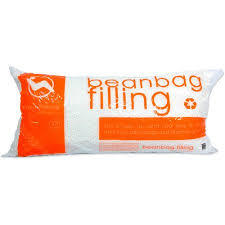
Get it! | | Durable, high quality, spacious functional furniture...we love these!! Fantastic solution for stuffed animal overload | | It holds a lot more than it appears | | An unexpected, WONDERFUL addition to our house | | See and discover other items: reading stands, storage solutions, toy storage furniture, comfortable reading chairs, great deals on furniture, comfortable reading chairCopyright © 2015 - 2017 Celebrating everyday life with Jennifer Carroll . Created by Blog Copyright. Batting, Fillings & Forms *Marked price shown in strikethrough. Discounts provided every day; marked prices reflect general U.S. market value for similar products.Greener Alternatives for Chair Stuffing? Good Questions: Greener Alternatives for Chair Stuffing? Lynn sent us a good question: I am recovering the seats of 4 dining room chairs (40+ years old). I'm not sure yet about the condition of the padding under the current upholstery. If necessary, where can I find an alternative batting/padding/cushioning material to the toxic chair pads that I found in a big fabric/crafts store?

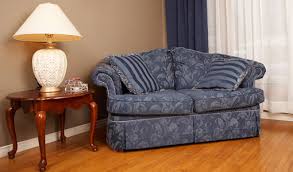
Of all seating, dining room chairs get the brunt of the abuse — a little vino here, red sauce there. If you’ve been glaring at those chairs and wondering how to give them that much-needed facelift, read on, and you’ll be transforming those eyesores into jaw-droppers in no time.
shaker chairs for sale uk Read the full post on reupholstering dining chairs after the jump! Don’t forget to check out Upholstery Basics: Tool Time to learn more about the tools we’re using today. 1. Remove the seat from your chair frame by unscrewing the screws on the underside. If your seat drops into the frame, like mine, you may be able to pop it out without unscrewing it. Make sure to mark the orientation of the seat before removing. It may seem obvious, but it is imperative that we know which side is the front when we attach the fabric later. 2. Strip all of the old fabric, padding, staples and tacks off of the seat using your pliers and staple remover.

Once you’re finished, you should be left with a wooden board. This is a good point to mark any screw holes, so you can avoid them as you attach new padding and fabric. 3. Flip the board upside down on top of the foam and trace the outside edge with a permanent marker. 4. Use the carving knife to cut out the shape. Don’t worry if the edges get a little ragged looking. Just do your best to keep the blade straight up and down and not angled to one side or the other. 5. To create a slight domed shape to the seat, place a layer of cotton batting about an inch inside the edges of the board. Add extra layers if you’d like the crown of the seat to be more exaggerated. Just remember to make each additional layer of cotton slightly smaller than the one that precedes it. 6. Attach the foam to the board by stapling through the side of the foam and down into the wood. It’s best to work in opposites as you staple, so start with the back side and then move to the front. Then staple from the right to left side.

Be careful not to push the foam back as you staple. We want the hard wooden edge to be padded, so it won’t show through the fabric. 7. Dacron will smooth out all of the imperfections and be the final layer of padding before the fabric. Once the foam is secured all the way around, tightly wrap Dacron around the edge and staple to the bottom of the board. 8. Trim off the excess Dacron gathered at the corners and around the bottom. 9. Now it’s time for the fabric! If you’re working with a pattern, decide where you’d like it placed on the seat. The rule of thumb is to place the top of the pattern at the back of the seat and the bottom of the pattern at the front of the seat. 10. To get started, staple the fabric at the back of the seat, but only put the staples in halfway by lifting one side of the staple gun up at an angle. These are called sub-staples and will allow you to pull them out very easily should you need to make adjustments. Once you’ve stapled the back, move on to the front.

Then sub-staple the right and left sides. 11. Make a pleat in every corner by pulling the fabric from the sides around to the front and back. Fold under enough of the excess fabric to make the edges of the folds flush with the corners. Feel free to cut out bulky excess if you’re having trouble getting it all folded under the pleats, and use your regulator to get the fabric neatly tucked in. 12. Once you’re happy with where your fabric is placed, take out your sub-staples a few inches at a time and replace them with permanent staples that go in all the way. These will need to be closer together to make sure all the fabric is held down tightly. Keep a close eye on the edge as you go. The more consistent you are with the tightness of your pull, the smoother the fabric will look. Another tip: Pull with your palm instead of your fingertips to avoid puckers and dimples. 13. It’s looking like a finished seat now! After you’ve cut off the excess fabric, permanently staple the dustcover to the front side of the seat.