high heel chair plans

A do-it-yourself high heel shoe chair can be custom built with little to no carpentry skills and a few supplies purchased from a hardware store or online. Building this chair is a fun project that can be brought to completion over the course of a single weekend. The assembly makes this chair a great family venture, as there are several steps that can be completed with your kids' help. Building the chair yourself also allows you the opportunity to choose the colors and decorations that best suit you. Step 1 Place the planter right side up on a flat surface. The diameter across the center of the opening should be 28 inches. Find two points on the circumference of the planter that are exactly 20 inches across from one outside edge of the planter to the other, and mark these points with your marker. Find the spot on the circumference that is exactly between these two spots and mark this with your marker. Step 2 Turn the planter over and find the spot on the base directly above the center spot you just marked.

Mark this place on the base. Draw a straight line from the point on the base to each of the side points that you marked. This planter will serve as the seat of your chair, and you will need to cut out this segment to add the backrest.
chair sashes cheap uk Step 3 Cut out the segment of the planter you have just outlined with your miter saw.
buy wheelchair orlandoPlace your 44-inch by 20-inch plywood sheet against the planter at the spot where you have just removed a segment to ensure that it fits properly.
glider chair covers saleMake adjustments with the saw as needed. Once your fit is correct, place the board on a flat surface. Flip the planter onto the side you have just cut out and glue it to the base of the board, stacking some books beneath it if it will not stay up on its own.

Allow the glue to dry for 24 hours. Step 4 Turn the planter back over so that it is once again upside down. You should now have something that resembles a high heeled shoe without the heel. Make the top of the heel with the 20-inch by 20-inch plywood sheet. One edge of this sheet will abut the edge of the backrest, and the other must by rounded. Round the edges of one side of your 20-inch by 20-inch sheet with your miter saw. Step 5 Place your wooden post where the heel of the shoe should be. Set the 20-inch by 20-inch plywood, with the rounded side facing to the back, on top of the post. Make sure the edge of the sheet is abutting the backrest. Glue all of the pieces into place, applying the wood glue generously, and allow it to dry for another 24 hours. Your frame is then ready to be upholstered. Step 6 Place the butcher paper on a flat surface and outline the foot and heel of your shoe on the paper. Cut these pieces out and set them aside. Step 7 Wrap the heel of the shoe twice in batting and secure the batting with staples.
Wrap the backrest with the batting four times to create a cushion and secure the batting with staples. Wrap the front of the planter twice in batting and tuck the edges of the batting underneath of the planter, securing it with staples under the planter, at the top of the planter and at the back of the shoe. Trace the seat pattern onto the batting and cut out five layers to make the seat of your chair. Place this batting on the seat and staple it into place. Step 8 Trace the seat pattern onto the back of your upholstery fabric and add 30 inches to the radius to make a large circle. Place the large circle on the seat, right side up, and fold the bottom edges under the planter. Fold the back edge of the circle to fit the seam it meets the backrest at. Staple the fabric to the underside of the planter, and glue it along the seam at the backrest. Step 9 Measure and cut your upholstery fabric to fit the backrest of the chair and the heel. Secure the fabric into place with staples and glue.

Make sure that your seams are at the underside of the backrest and the inside of the heel so that they are not visible when you are finished. Step 10 Trace the foot and heel of the shoe onto the rubber matting and cut out both shapes. Glue them to the bottom of the heel and the planter to make the sole of your shoe. Step 11 Trim the shoe chair with the piping to hide seams and decorate the chair. Measure a lengths of piping to add to the bottom of both the heel and seat, as well as another around the top of the seat, backrest, and heel. Cut the piping and glue it into place. Allow the glue to dry for at least 48 hours and your chair is ready for use.Reasons I Love You Why I Love You Personalized Books Wedding Gifts Wedding Day Love Book Romantic Ideas Boyfriend Gifts The Foundation Forward LoveBook is the most unique personalized gift idea you could ever give to someone you love. Create your own personalized book of reasons why you love someone. LoveBook is the perfect personalized gift for someone you love.

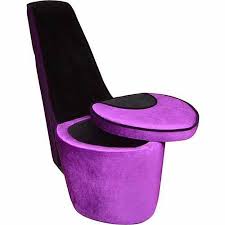
How to Build a High-Heel Chair Fantastically fluffy and kitschy, the high heel chair is the perfect addition to any fashionista's boudoir. With minimal carpentry skill and a little DIY spunk, this contemporary chair design can easily be built in a weekend. Build the Chair Frame Flip the wooden planter over, this is going to make the seat of the chair. Measure a line that is reclining back 45-degrees and draw the line onto the planter on both sides. The objective is to cut the planter so that the 44- by 22-inch plank of plywood will but up tightly underneath the planter, forming the backrest. Cut the angle into the planter with the miter box saw. Try fitting the plywood plank snug against the angle. If it doesn't fit quite right, measure and adjust as needed. Turn the planter on its side. Put the plywood into place and nail it onto the planter using the nail gun. Use equal amounts of nails (five or six) up either side to ensure that the back is securely attached to the seat.

Flip the chair back over, as if you were going to sit on it. It will now look like the foot part of a high heel shoe, minus the heel. Next, you need to cut the 22- by 22-inch square of plywood. One side will be rounded to make the back of the heel. The other side will be angled with the miter box saw to fit against the 44- by 22-inch plywood chair back. Cut the angle first using the miter box saw. This is the trickiest part to get right, and it is advisable to measure twice and cut once--making small adjustments if needed once you've cut the initial angle. Next, draw a "U" shape onto the other outside edge of the wood and use the circular saw to round the back edge of the plywood to look like the heel of a shoe. Attach the piece you created in Step 5 to the chair back using the nail gun. Next, place the 44- by 12-inch pole under the "heel" of the shoe and nail it into place using the nail gun. This completes the high heel shoe chair frame. Roll out the butcher paper onto a flat floor surface.

Make a pattern of the bottom of the shoe on the paper, both the main portion of the shoe and the spike of the heel. This will be used to make the cushion piece for the seat of the chair and the "sole" of the high heel shoe chair. Cut the pattern pieces out and set them aside. Pad the spike and back of the heel. Wrap cotton quilt batting around the spike of the heel and secure it onto the heel spike and chair back (the back side, facing the sole of the shoe) using the staple gun. One or two complete wraps is sufficient for the heel spike. Use more on the chair back, as you want it to be a plush backrest. Wrap cotton quilt batting around the front of the planter chair to where it connects with the backrest. Tuck the edges under the bottom of the planter and staple into place. Also staple at the back of the shoe and the top of the seat. Trace the seat pattern onto the quilting and cut out five or six layers of the batting for the seat. Place it onto the seat and staple around the outside.

Trace the seat pattern onto the backside of your fleece. Then add 28 inches to the radius of that circle and make a larger circle around it. Cut the fabric out and place it onto the seat. Tuck the bottom edges into the planter seat and staple into place. Cut the back edge to fit the seam where the backrest meets the seat and tuck the edges under, securing it in place with hot glue. Measure and cut fleece fabric to fit the back and heel of the chair. Wrap it around the batting and make a seam along the backside of the back and heel. Staple the material into place. Trace the heel and seat pattern onto the rubber matting. This will make the "sole" of the chair. Cut the matting out and secure it to the bottom of the seat and heel spike by nailing around the perimeter of the chair with the nail gun. Embellish the high heel chair with piping. This serves the dual purpose of hiding the seams in the fabric of the chair. Hot glue piping around the top and bottom of the seat, the bottom of the heal spike and anywhere else a festive touch is needed.

Wear eye protection when cutting wood with a power saw. Clamp the wood in place to keep your hands away from the blade. You May Also Like A fancy high-heel shoe party is an ideal theme for any ladies' event. Alternatively, incorporate the theme into birthday parties, work gatherings... Creating papier-mache high heels can be the beginning of a room's decor or the finishing touches. The process of papier-mache is often... Wood carving can create a variety of crafts. One of these crafts is to make high heeled shoes. Making wooden heels requires... The image of a little boy shining shoes on a street corner is a part of American culture. We've seen that image... Learning how to make a baby's high chair is fairly simple to those who have woodworking experience, and can remain only moderately... Wooden high chairs are a classic piece of baby furniture and many are considered family heirlooms. While many antique versions are intricate,... Building your own furniture can be a highly rewarding experience, and few such projects are as rewarding as building a crib or...