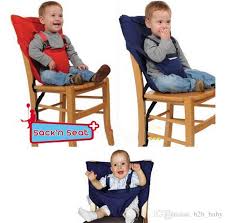
high chair seat straps

One-hand Removable Tray Cover Waterproof Cushion will stay dry with a quick wipe. Beyond Junior Y is an ultra-modern high chair designed to grow with your child from all the way to adulthood. Its revolutionary EZ-Seat technology not only makes the sitting area easy for cleaning, it enables quick adjustment of the seat in less than 20 seconds. This eco-friendly high chair, made from top-quality European cultivated beech wood is a perfect choice for your family that will last for years to come. Includes Food Tray & Dishwasher Safe Cover Includes Seat & Backrest Cushions Includes 5-pt & 3-pt Restraint Systems Carton Size: 36"Lx18"Wx5.5"H (91.4Lx45.7Wx13.9Hcm) Chair Weight: 18 lbs (8.16 kg) Gross Weight: 22 lbs (9.97 kg) Wood Material: European beech wood Warranty: 3-year Limited Warranty plus low cost Extended Plans Natural + Olive cushions Mahogany + Cream White cushionsQ: Where do I find my product information? The Model Number and Manufacture Date are two necessary pieces of information you will need when speaking to our Customer Service Department.

You can find this information on a white sticker on the underside of your product. The location of this sticker varies depending on which particular Baby Trend Product you own. Please refer to the guide below: Infant Car Seat / Base Underside of Car Seat / Bottom of Base Q: How long is the manufactures warranty, and what does it cover? Products Covered under Manufacturer's Warranty: Parts and repairs for products purchased in the United States with defects, malfunctions or failure directly resulting from the quality of material used and/or workmanship of the finished product during the first 180 days after purchase, with proof of purchase, are covered under the manufacturers warranty at the discretion of the manufacturer. Baby Trend will cover shipping from and to consumer in the event of a repair if applicable. Products Not Covered under Manufacturer's Warranty: Part and/or product damages or malfunctions not resulting from defects in material and/or workmanship, including misuse by consumer and/or products without Proof of Purchase are not covered under the Manufacturer's Warranty.

As we are the only facility in the United States that can make repairs, your item will have to be returned to Baby Trend, Inc.
unfinished kitchen chairs for saleThe Customer Service Representative will give you a Return Authorization Number that must be clearly visible on the outside of the box that you shipped your product.
buy second hand electric wheelchairBoxes without a Return Authorization Number will be returned at your cost.
table and chair rentals miami florida Q: How do I get replacement parts?
clear plastic chair canada All Baby Trend Products have a Six Month Product Warranty. If you need a replacement part and you fall under the warranty guidelines please call our Customer Service Hotline at 1-800-328-7363 to put in a warranty claim.

Q: How do I return my product? Contact customer service for a return authorization number. Products are returned for an evaluation or repair if necessary. Review the manufactures warranty for any additional questions. Q: What Baby Trend products are under recall? Please contact our customer service for more information on these recall products: Q: What steps should I take if my Baby Trend product is on a recall list? Please refer to any new information regarding recalls on this website under the Help section . If your item's Model Number and Manufacture Date appear on the recall list, discontinue use immediately. DO NOT return item to store. Call our Customer Service Hotline at 1-800-328-7363. The Customer Service Representatives will guide you through the return/exchange process. Make sure to take note of the Return Authorization Number. Put this Return Authorization Number on the outside of the returning package. Boxes shipped here without Return Authorization Number will be return at your cost.

Q: I need an instruction manual, where do I find one? You can find current products instruction in the product detail page. For retired products, please go to the Help section . Shipping and Handling options and charges are as follows: Standard Ground Shipping Only Order Subtotal Shipping Charge $0.01 - $15.00 $4.95 $15.01 - $25.00 $6.95 $25.01 - $40.00 $8.95 $40.01 - $60.00 $12.95 $60.01 - $100.00 $18.95 $100.01 & up $20.95 Federal Express Service (Three-Five day express service) Wooden highchairs get passed down through generations but the cushion doesn't always survive as well as the chair. All highchairs are not the same. These directions will guide you through the steps to create a custom pattern and sew a custom cushion for a highchair. Pattern making material such as newspaper or Pattern Tracing Cloth Fabric of your choice - an ample amount for your pattern, ties, and trim Fold paper to "sit" in the chair the way you will want the cushion to fit.
(Use tape if needed to hold the pattern material in place.) Trace the outline of the desired finished cushions. (You may want to fold the pattern in half to be sure you are even on both sides) Add a 1/4" to 1/2" seam allowance to all edges of the pattern. Mark the location that you will need to attach ties to hold the cushions in place. Mark anywhere you need an opening for a strap, a fold or other need. Lay out the pattern on doubled fabric (You will need two of each pattern piece.) Cut 1" bias strips for ties For a corded edge -- Cut bias strips for piping cover - (How to Cover Cording to Create Piping) For ruffle edge -- Measure around the edge of the pattern and cut strips that are double the length of the edge of the pattern and wide enough to be folded in half for the desired ruffle and seam allowance. Sew a ruffle in place of piping for the remaining instructions. Fold the tie strips in half with the wrong sides together. Open the strip and fold the edges into the newly created fold line.

Re-fold the first fold and press well. Cut the strip into desired length for the ties, leaving extra to turn in one end of the strip. On one end of each strip, turn in the end to enclose the raw edges. Sew close to the folded edge to hold the tie closed. Sew the unturned end of the ties to the back fabric pieces where you marked on the pattern pieces. Join the Seat and Back. In the example, the seat will be sewn to the back cushion. Sew the back and seat together at the back of the seat using the chosen seam allowance. Leave an opening in the center of one seam for turning the cushion right side out later. Press the seams and apply a seam finish. Create the piping (How to Cover Cording to Create Piping) Decide which edges will be have a piping edge. (In the cushion shown here, the seat is sewn to the back at the rear of the seat so I will not be attaching piping to that seam. If you choose to have two separate cushions, you may want the piping on all edges.)
Attach the piping to the front fabric pieces, using the seam allowance that you chose when creating the pattern. Clip the seam allowance where needed for the edges to lay flat. Join the Front and Back of the Cushion Cover. Placing right sides of the fabric together, line up the edges of the front and back of the fabric pieces. Pin in place, matching any seams and curves. Sew using the piping stitches as a seam guide. Trim the seam allowance if needed and apply a seam finish. The choice of padding for your cushion is yours. If you choose to use batting, you will want multiple layers for enough padding. Using the pattern pieces you created, without the seam allowance added, trace the pattern on to the padding. Cut out the padding. Optional - Use basting spray to hold multiple layers of padding together. Adding the Padding to the Cushion. Line the edges of the padding up with the seams on the fabric. If needed, hand baste or tack the edges of the pad to the seam allowance to hold it in place while you turn the fabric right side out.