comfortable rocking chair plans

It looks like the page you are looking for either no longer exists or has moved to a new location. Please visit our home page to start your journey again. is an online database that categorizes links alphabetically to resources found at other woodworking web sites. Founded in 1998, information is hand picked and new woodworking information is added every day. So if you are frustrated There is no cost to use the database. Registering is not required. should be able to browse the database and click through the links. considering the fact there are so many browsers out there being used, this site's software might not allow some visitors to browse, it all depends on the Internet traffic, and your browser's compatibility. The online database is primarily four main sections, the Index of Links, the Free Woodworking Plans, the International Distribution Center for woodworking plans and the Buy It Then Build It section. The top of the database starts here.

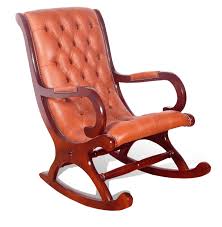
Join the free 3-day course to learn how to become self-sufficient:Rocking Chair Plans White Rocking Chairs Front Porch Chairs Front Porches Woodworking Plans Woodworking Projects Diy Projects Porch Furniture Wooden Furniture Forward I want a white rocking chair from Cracker Barrell for just like this to put on my porch.
black accent chair torontoI am so jealous my neighbor has one and reads there.
high back chair staplesSeems like a heavenly idea to me!
high back armchair australiaDiy Pallet Projects Pallet Ideas Wood Projects Upcycling Projects Pallet Art Pallet Stool Pallet Benches Pallet Shelves Wood Shelves Forward When I'm driving I have another pair of eyes, spotting junk left on the streets to "die"...
cheap duck egg blue armchair
Cannot leave those pieces of wood behind, so I bring them home and give them new life. I've made this rocking chair and stool… Building a Simple Rocker DVD and template bundle The complete guide to learning how to build a simple rocking chair.
cheap peppa pig table and chairsThis DVD is for any woodworker, from those rich in experience to the beginning splinter-maker, allowing them to build this simple, yet elegant and extremely comfortable Montana Rocking Chair.
wooden dining chairs walmartThe Montana features flexible "splats", clean lines and a scooped seat, all of which are fully explained in the DVD. There are no special tools required for building the Montana Rocking Chair. In fact, only 2 readily available router bits are used in construction. A bare minimum of shaping and grinding ensure this rocker will be a fast and satisfying project.

All jigs and forms are included in the Template Set, as well as easy-to-use templates for each part needed for the project. The construction techniques are demonstrated clearly and precisely, including all required measurements and joint details. The Montana Rocking Chair will become an immediate favorite project for many woodworkers, suitable as gifts for family members and friends. Speaking of gifts, the DVD and Template Set for the Montana Rocking Chair would make an excellent stocking-stuffer for the woodworker in your family. More projects for you to tackleRocking chair plans Mobili in legno fatti a mano Sedie a dondolo per bambini Progetti per la lavorazione del legno Sedie a dondolo per esterni Craftsman Rocking Chair Plans - Furniture Plans and Projects | I want a white rocking chair from Cracker Barrell for just like this to put on my porch. Seems like a heavenly idea to me! Teds Woodworking® - 16,000 Woodworking Plans & Projects With Videos - Custom Carpentry — TedsWoodworking #woodworkingplans #woodworking #woodworkingprojects Pallet Rocking Chair |

Outdoor Rocking Chair - Outdoor Furniture Plans and Projects | Boston Rocking Chair Plans - Furniture Plans and Projects | Build Rocking Chair - Furniture Plans and Projects | Kids Rocking Chair Plans - Children's Furniture Plans and Projects | Wooden Rocking Chairs: 7 Most Comfortable - Hometone Windsor Rocking Chair Plans - Furniture Plans and Projects | Arts & Crafts Rocking Chair Plan - Furniture Plans and Projects |  Free rocking chair plans How To Build A Rocking Chair By Yourself - Free DIY Furniture PlansRocking Chair Plans White Rocking Chairs Front Porch Chairs Front Porches Woodworking Plans Woodworking Projects Diy Projects Porch Furniture Wooden Furniture Forwards I want a white rocking chair from Cracker Barrell for just like this to put on my porch. 23 Modern Rocking Chair Designs A rocking chair is a type of chair with two curved bands (known as rockers),which contact the floor at only two points, giving the occupant the ability to rock back and forward.

This chair design is very comfortable for every age and everybody should have it at home. This rocking chair is good for the new parents too. You can have some much needed rest while enjoying with your child. Many people find rocking chairs soothing because of the gentle motion. There are so many designs of the rock chair, but the most popular is the traditional wooden rock chair. The most comfortable rock chairs are those with cushions. When choosing a rocking chair, comfort should be your first priority. Other important thing is high quality workmanship and premium components. You need to find the right one that fit your needs and your decor. Rock chairs make perfect cozy to relax in your living room and your porch too. Those chairs are good for reading books, nurse a new baby, or simply for everyday relaxation. Recent posts in ChairThese Adirondack chair plans will help you build an outdoor furniture set that becomes the centerpiece of your backyard. It's a good thing that so many plastic patio chairs are designed to stack, and the aluminum ones fold up flat.

That means we can get them put away and stored out of sight as quickly as possible. But, if you think outdoor furniture should enhance your yard and garden, consider a chair that evolved on the porches of summer homes and resorts of upstate New York. It's an object that no one will want to hide, because it simply looks so good: the Adirondack chair. Our version has come a long way from the early types that had flat backs and seats -- and, we've added a matching table so you'll have a stylish surface for cool drinks and a good book. Although there are a few angles and curves to cut, there's no fancy joinery -- everything's held together with corrosion-resistant deck screws. We used cedar for these pieces because it stands up well to the elements, and it's available in the required 3/4- and 1-in. thicknesses. You could substitute pine if you plan to keep the pieces out of the weather. If you're building more than one chair, it pays to make templates for parts like the side rails, arms and back rails.
The patterns also will come in handy when your friends see your work and ask you to make chairs for them. Model designed in Alibre Design Xpress. Get your FREE copy today! View a larger version of this animation Download printable plans of the Adirondack chair and table. (Requires Adobe Reader ). QTY. SIZE DESCRIPTION A 2 1 x 5-1/4 x 33-3/4" cedar side rail B 1 1 x 4-1/4 x 23-1/4" cedar top back rail C 1 1 x 3-1/2 x 23-1/4" cedar bottom back rail D 9 3/4 x 2-1/4 x 23-1/4" cedar seat slat E 7 3/4 x 3-1/4 x 35-1/2" cedar back slat F 2 1 x 4-1/4 x 20-1/2" cedar front leg G 2 1 x 2-1/2 x 29" cedar back leg H 2 1 x 2-3/4 x 6-1/2" cedar arm bracket I 2 1 x 5-1/4 x 28" cedar arm J 2 1 x 5-1/4 x 16" cedar foot K 2 1 x 1-1/2 x 19-1/4" cedar cleat L 2 1 x 5 x 16-1/2" cedar leg M 2 3/4 x 5 x 17-1/2" cedar stretcher N 5 1 x 3-3/4 x 24" cedar slat O as required 1-5/8" No. 8 fh deck screw P as required 2" No. 8 fh deck screw Making the Chair Seat Lay out the side-rail shape on your stock, cut to the lines with a jigsaw [1] and sand the edges smooth.
Then, cut the back rails to size, and saw the curves that give the chair back its concave shape. Note that the cut on the top rail is square, while the bottom rail has a 7-degree bevel. Cut the seat slats to size and round the upper edges of each with a 1/4-in. quarter-round bit in a router table. Then, round the exposed edges -- those that won't abut other parts -- of the side and back rails. Keep the router table set up for this job so you can round the edges of the other parts as they're made. Because of the shape of the seat, most of the slats require bevels on one or both edges. Use a table saw or hand plane to cut the bevels. Start seat assembly by screwing the lower back rail to the seat sides with one screw at each end of the rail. Then, add slat No. 4 as indicated in the drawing, again using only one screw at each end [2]. Measure opposite diagonals of the subassembly and adjust it until it's square. When you're satisfied, add a second screw to each end of the two slats to lock the pieces in position.
Use a 1-in.-thick block as a spacer to position the rear seat slat [3]. Then install the remaining slats. Because the seat is curved and many of the slat edges are angled, don't try to measure these spaces. Instead, simply arrange the slats by eye so that they appear uniform. Cut the front legs to size and round the long edges on the router table. Mark a line on the inside face of each leg that indicates the bottom edge of the side rail. Then, attach the legs to the seat assembly with screws driven from the inside of the side rails [4]. The back slats are tapered to create a fan shape when installed. Cut each 35-1/2-in.-long slat blank so one end is 3-1/4 in. wide and the other is 2-1/4 in. wide. We did this on a band saw, but a jigsaw will work, too. Smooth the sawn surfaces, cut the curved top ends and round the edges. Cut the rear legs to size, angling the top ends at 64 degrees. Clamp each rear leg to a side rail, bore and countersink screw pilot holes, and secure the legs with screws [5].

Next, screw the top back rail to the top ends of the back legs [6], and lay the chair on its back to install the back slats. Place a 4-in. block under the upper back rail to provide clearance for the long back slats. Mark the centers of the top and bottom back rails, align the center back slat with these marks and screw it in place [7]. Then install the outer two slats [8]. Secure the remaining slats so the top curved ends are aligned and the spaces are uniform. Cut out the arms and arm supports, and round the edges. Temporarily clamp the supports in place and secure them with screws [9]. Then, attach the arms to the front and rear legs with screws [10]. The table is built the same way as the chair -- all exposed edges are rounded on the router table and the parts are simply screwed together. Lay out the feet on 1-in. stock and cut to the lines with a jigsaw, then cut the remaining rectangular pieces to size. Attach each foot with three screws [11], then bore pilot holes and screw the two stretchers to the legs [12].