child rocking chair plans

Hallway Storage Bench Entryway Bench Storage Benches Diy Storage Wall Storage Rustic Hall Trees Hall Tree Bench The Top The O'jays Forward Our total cost for this build… $120! We chose to use 1×3 for the bottom trim, and we used 1×4 and 1×3 for the top trim. We love the rustic look, and we love that it saved even more money.The requested URL /index.php?cat=457 was not found on this server.It looks like the page you are looking for either no longer exists or has moved to a new location. Please visit our home page to start your journey again. is an online database that categorizes links alphabetically to resources found at other woodworking web sites. Founded in 1998, information is hand picked and new woodworking information is added every day. So if you are frustrated There is no cost to use the database. Registering is not required. should be able to browse the database and click through the links. considering the fact there are so many browsers out there being used, this site's software

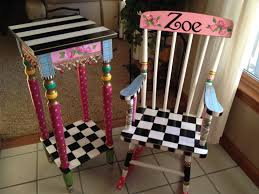
Pint-size Rocking Chair Downloadable Plan
table and chairs rental san antonio tx from the WOOD Store
deck chairs uk ebay Skip the gaudy, plastic children's furniture.
vintage office chair springsThis chair has contemporary style and a timeless design.
used wrought iron chairs for saleIt's simple to build using screw joinery tastefully hidden by accent plugs. Plus, it's tough enough for your favorite active kiddo.Featured in WOOD Issue 236, November 2015 View in WOOD Store Toys and Kids Furniture Plans Safely planing stock to thin dimensions Attempting to run thin pieces of stock--less than 1/2" thick--through a self-feed planer often... read more

This step by step diy woodworking project is about kids rocking chair plans. Building a small rocking chair for your children is a great way to entertain them but also a great opportunity to learn new woodworking techniques and to spend a nice weekend doing what you like. However, it is essential to remember that only a proper planning will keep the costs under control. This chair is both easy to build and has a neat design that can match any style. There are a few aspects that you should take into account before starting the construction of the rocking chair. Therefore, we recommend you to invest in high quality lumber, such as pine, cedar or redwood, especially if you are going to place the chairs outside. Use professional tools and always take accurate measurements, otherwise there is a chance that they will not fit together. A – 2 pieces of 1×3 lumber – 14″ long, 2 pieces – 26″ long LEGS B – 2 pieces of 1×3 lumber – 12″ long, 2 pieces – 11″ long, 2 pieces – 8 1/2″ long FRAME

C – 5 pieces of 1×3 – 12 1/2″ long, 3 pieces of 1×3 lumber – 11″ long SLATS D – 2 pieces of 1×4 – 20″ long, 2 pieces of 1×2 lumber – 11″ long ROCKERS 3 pieces of 1×3 lumber – 8′ 1 pieces of 1×4 lumber – 6′ 1 pieces of 1×2 lumber – 6′ 10 pieces of 2 1/2″ screws 50 pieces of 1 1/4″ screws 50 pieces of 2″ brad nails Hammer, Tape measure, Framing square, Level Miter saw, Drill machinery, Screwdriver, Sander Post hole digger, Concrete mixer Safety Gloves, Safety Glasses Top Tip: A rocking chair for your kids will keep them busy and put a smile on their faces. Building the small chair is relatively easy and any person with basic skills can get the job done. The first step of the woodworking project is to build the legs of the rocking chair. As you can easily notice in the plans, we recommend you to use 1×3 lumber and to make a few cuts, if you want to add value to your project.
Mark the cut lines on the slats and get the job done with a circular saw. Smooth the cut edges with a piece of fine sandpaper, making sure you don’t remove too much material. The next step of the woodworking project is to attach the seat frame to the wooden legs. In order to get the job done in a professional manner, we recommend you to build the frame from 1×3 lumber. Cut the components at the right size and lock them together with 1 1/4″ galvanized screws and waterproof glue. Drill pilot holes before inserting the screws, to prevent the wood from splitting. Alternatively, you should use pocket holes. Use a spirit level to check if the legs of the chair are plumb. In addition, make sure the seat frame is horizontal. Lock the legs to the frame by inserting screws from the inside of the chair. If you want to enhance the look of the small rocking chair, you should consider adding 1×3 trims to both sides. Cut the components at the right size and lock them into place with finishing nails and waterproof glue.

The next step of the woodworking project is to attach the slats to the seat of the chair. Therefore, cut the 1×3 slats at the right size and lock them to the frame with galvanized screws. Countersink the head of the screws, if you want to get a professional result. Top Tip: Similarly, you should fit the 1×3 slats between the back legs, in order to create the back support. Work with attention and add waterproof glue to the joints, if you want to create rigid joints. Drill pocket holes at both ends and secure them to the back legs with 1 1/4″ screws. Maybe the most difficult step of the project is to build the rockers and to attach them to the kids chair. As you can easily notice in the plans, we recommend you to mark the cut lines on the 1×4 boards and to build the rockers with a jigsaw. Top Tip: It is essential to round the ends of the rockers, if you want to get the job done in a professional manner. Smooth the cut edges with sandpaper and lock them to the legs with galvanized screws.

More cutting details for the rockers. Make sure the two rockers are identical. Use a sander to smooth the edges and to even out the surface. Drill pilot holes through the rockers and insert 2 1/2″ screws into the legs of the chair. Add glue to the joints, so you enhance the bond of the joints. Alternatively, you can drill pocket holes through the legs of the chair and insert the screws into the rockers. Irrespective of your choice, make sure the edges are perfectly flush. You should also consider attaching 1×2 stretchers between the rockers, so you add strength to the frame. Use glue and 2″ brad nails to secure the pieces into place. Make sure the corners are square before inserting the nails. One of the last steps of the woodworking project is to take care of the finishing touches. Therefore, fill the pilot holes with wood putty and smooth the surface with 120-grit sandpaper. Top Tip: In order to protect the lumber from water damage, we recommend you to cover the components with several coats of paint.