chair rail molding purpose

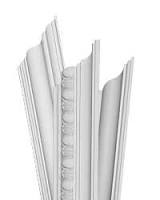
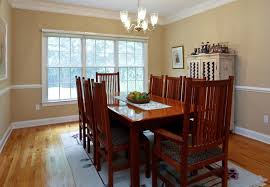
Use of this site constitutes agreement with the SAFETY DISCLAIMER!, Privacy PolicyPedicure Chairs For Sale Chair Rail Molding Chair Railing Salon Chairs Bob Village Moulding Cozy Homes Panelling Wainscoting Forward World-class nail salons require world-class spa pedicure chairs. We've hand-picked the absolute best for you. Keep your clients coming back time after time!uDecor moldings are made of architectural grade polyurethane. They are durable, lightweight, waterproof and long-lasting. They will not warp, rot, or attract mold. uDecor trim is installed and painted just like traditional wood millwork, and the finished product is just as breath-taking. Support: We've produced great video tutorials like: How to Install Crown Molding. Also, we're here during the week for questions from you or your contractor. Please contact us and let us know how we're doing. We're always looking to improve our services. What makes this room the perfect retreat to relax in? Let's start by imagining what it would be without the warm paint tones.

Now, remove the crown molding, wall boxes, and chair rail. What are you left with? When you are a WishiHadThat customer you can expect to receive the best overall experience from the time you visit our site until your project is complete. Our goal is to go beyond simply satisfying you and part of that is ensuring that you are not only getting the best products for your project but also the best pricing. I love the look of chair rail in a room. Chair rail is one of the most versatile types of molding and adds a decorative border around the wall. It is used as a dramatic accent separating two colors of paint, paint and wallpaper, or wainscot and paint or wallpaper. Chair rail gives a room dimension and adds a lot of character to the design. Chair rail also comes in many widths and styles to suit any application. There is a lot of debate about the history of this popular molding? It has been proclaimed for years that chair rail began as a means to keep chairs from marring walls.

It’s true, that has been one purpose of chair rail since colonial times. It is interesting to note, the Shakers had pegs in their chair rail to hang the chairs on when sweeping. I like this idea as I never know what to do with the chairs when I am vacuuming around the dining room table and I am constantly moving them out of the way. By doing a little research, I discovered that excavations of ancient Greek and Roman ruins have shown these civilizations used wood trim to divide walls into visually pleasing proportions. So, we know something similar to chair rail dates back at least 2,000 years. Chair railing, or a dado rail as it is sometimes called, is often used in combination with crown molding and baseboard molding for a finished look. Panel molding and corners are used to create various shapes for a wainscot look that is often capped with a chair rail. What is the proper height of chair rail? The most often question asked when installing chair rail is the height of the rail from the floor.
A general rule of thumb is 1/3 the height of the wall, or 32-36 inches from the floor for an 8-foot ceiling. Many designers prefer a lower rail at 1/4 the height of the wall. A mistake many DIYers make is putting the rail too high according to many professional designers.
lazy boy chair not workingColonial homes and early 18th century designers used the height of the window sill as the rule for placement of the chair rail.
where to buy wheelchair in hong kongI will be adding chair rail in my living room soon as part of a room makeover and like the idea of having the chair rail at window sill height, which is 33 inches for my project.
when to buy a highchair for babies 1 – MEASURE the distance from the floor to determine the height of the rail.
lazy boy chair in a half
More than an easy way to add architectural interest and classic style to bare and basic walls, chair rail is also a fairly straightforward addition that most DIYers can tackle in a weekend. Follow our steps for installation, and give your space an embellishment to brag about. – Chair rail molding – Masking tape or pencil – Compound miter saw or handsaw and miter box – Hammer or pneumatic nailer – 2-1/2-inch finish nails – Wood glue or construction adhesive – Caulk and caulk gun – Paint or stain Before you purchase materials, determine how much molding you’ll need by measuring the length of your walls at the appropriate chair rail height. As a general rule, chair rail should be applied one-third of the way up the wall from the floor—so for a room with an 8-foot ceiling, installing the chair rail at around 32 inches is a safe bet. When considering how much to buy, make allowances for miter cuts and mistakes by adding about 1 foot to the length of each wall.

Shop around for your favorite style of molding, mindful of the room’s existing trim when making your selection. Installation will be easiest and will look best if the molding is similar to and no thicker than the trim around the room’s doors and windows. Whether you’re interested in a simple, restrained look or something more ornate, most big-box home improvement stores will carry a wide selection of molding to choose from. If you strike out there, though, a local millwork dealer or lumberyard is sure to have options that suit your style. If you’re looking to paint or wallpaper your room, do that before you install the chair rail, and plan to touch up afterward as necessary. Next, find the wall studs and mark their locations with masking tape or a pencil. Then, use a level and measuring tape to draw a guideline around the room at the height where you want the chair rail to sit. If your floor is not level (a common issue in older or historic homes), you may need to split the difference between the guideline on the wall and a consistent measurement from the floor, otherwise the chair rail could end up looking crooked even if it is truly level.

Evaluate your space so you can figure out a plan of attack for cutting the molding to fit. If possible, start at a window or doorframe that requires only one piece of molding that can be cut at a 90-degree angle on both ends. For everything else, you’ll need to employ a few other cuts to create specific joints. • If one of your walls runs longer than your longest piece of molding, connect two pieces with a miter joint. The two should join over a wall stud, so first measure along the wall and cut the moldings to a length at which they will overlap at the stud. The cuts should be at opposite 45-degree angles. • For inside corners where one of the strips of molding has been finished with a square cut, you will have to cope the end of the connecting piece for a seamless joint. • For outside corners, a miter joint formed from two matching 45-degree angles will do the trick. Not all outside corners are perfect right angles, however, so it’s best to use scrap pieces to test the corner angle before making the cut on your molding.
If you want to apply a stain to your molding, do so before attaching it to the wall, and touch up after as necessary. But if you want to paint the molding, it’s best to apply a coat of primer first, attach the molding to the wall, and then paint the molding once it’s set. To install the molding, apply wood glue or construction adhesive to the back of the first piece and attach it to the wall, placing the bottom edge of the wood at the guideline you marked in Step 3. Secure each piece with two 2-1/2-inch finishing nails in line with each other. When you’re bringing two ends together in a miter joint, add extra wood glue at the joint, and complete the seam with two finishing nails into the studs. Use a nail set to recess the nail heads to achieve a smooth appearance. Continue with each piece until you complete the room. Once you’re sure all nail heads are recessed, use wood filler to fill the holes and any gaps at joints. Then, lightly sand the filler and the joints.