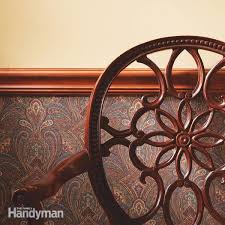
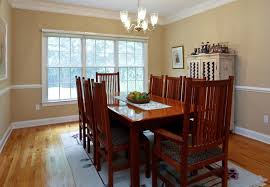
chair rail molding diy

Measure the wall according to the length to determine how many lengths of chair rail molding will be needed. To determine the height of the chair rail, measure the height of the ceiling and divide it by three. The general rule is that the chair rail should be about 1/3 of the way up from the floor (between 32" and 36" for an 8’ ceiling). You can also slide a chair up to the wall and mark where it would hit the wall. Once you've determined the height, use your tape measure and level to make a level line along the whole length of the room. Floors are not always level, so using a level to set your line will ensure that your chair rail will be straight. At your miter saw, mark the molding for your first piece (Image 1). It's simplest to start with an inside corner (or a door or window frame) and use a square (90-degree angle) cut. Cut one piece of molding for each stretch of wall, remembering to use 45-degree angled cuts for the corners (Image 2). If a wall is longer then the length of a single piece of molding, two pieces should be mitered together.
Use opposite 45-degree cuts at the ends that meet to create the miter (connecting each length of molding with a 45-degree mitered edge will create a cleaner, smoother joint). Make sure you position the seam over a wall stud so that the two ends can be nailed into the wood. In most cases, wall studs are spaced 16 inches on center. When all your pieces of molding are cut, begin installing them starting with an inside corner (Image 1). Align the bottom of the molding with the level line you marked earlier. Attach the first piece to the wall with wood glue and then secure it to the wall using a pneumatic nailer and 2 1/2" finishing nails (Image 2). Insert the nails into the high parts of the molding to prevent splitting. As shown in Image 3, the nails should be placed into the molding one above the other. Additionally, the wall or molding might not be perfectly straight, so you may have to maneuver the molding to align it as you go along. When all of the chair rail molding has been installed, use a nail set to recess the nail heads, and then cover up the nail holes with wood filler.

We love to DIY. You love to DIY. See the latest DIY projects, catch up on trends and meet more cool people who love to create.
used church chairs in california Make It. Fix It. Learn It. Find It.
chaise lounge chair australia Get quick inspiration from Made + Remade each week.
wood chair parts replacement The Essential Steps to Landscape Design
bean bag chairs historyTry These Plants and Groundcovers 10 Things You Must Know About Landscaping Lush Landscaping Creates Major Curb Appeal Making A Checkerboard Patio Garden How to Design a Great Yard with Landscape Plants How to Landscape Around a Back Deck
Groundcovers and Plants to Use As Lawn Alternatives How to Landscape a Shady Yard How to Shape a Lawn or Garden Space Add Interest to Your Lawn With Ornamental GrassesSketch out the floor plan of the room, noting the exact length of each section of wall. Add a foot to each length for waste to get the minimum size you need for each wall. Once you decide on a style, you'll need to do some juggling to make the standard lengths that the lumberyard sells fit the lengths that you need. The best way to keep track of what piece goes where and avoid wasting expensive wood is to make notes on the sketch. Here are some shopping tips: When possible, buy pieces long enough to span the If you plan to stain and varnish the trim, select pieces with similar grain pattern and color. Check each piece for flaws such as splits and tear-out. To avoid heavy sanding, select pieces that have a smooth surface. Watch out for deep “chatter marks” (a wavy surface left

by the milling machine). Home centers only carry a few pine and oak chair rails. larger selection, ask about special-order profiles or visit a lumberyard that caters to professional contractors. Many types and combinations of moldings can be used as chair rail, even if they aren't Also use your sketch to plan the location of coped cuts, so that you don't end up with pieces that have to be coped at both ends. If possible, locate coped pieces on walls where the non-coped end can be marked in place. That way you can shave the coped cut down, or even recut it if you have to, before you cut it to length. Even pros have to tweak their cuts, so leave yourself a little extra wood to work with. Get Better Results With an Air Nailer Until the 1990s, air nailers were so expensive that many carpenters didn't use them. whole lot cheaper now; even if you do only occasional carpentry, they're well worth the investment.