chair rail molding bits

When Jett and Leslie moved into their new house, the first order of business was brightening up the guest bath. Plain-Jane white cabinets and very ordinary white fixtures caused the white walls to blend in with the rest of the room, making the room appear small and cramped. After painting the top half of the wall a rich Tuscan gold, Jett and Leslie decided to create an easy, beautiful visual break by adding a chair rail moulding about 30″ off the floor. “We chose finger-jointed, primed Southern pine because it is so strong and doesn’t warp or twist. It doesn’t show any knot holes either. We live in a humid climate and Southern pine isn’t affected by moisture,” said Jett.“We love the way it looks,” said Leslie. “It was an easy weekend project and it just changed the entire look of the room.” Measure the space to be covered by the moulding. Purchase a little extra moulding to allow for cutting mistakes. Using a miter box, have a partner hold the long pieces of moulding in place while you saw.

Remember: “Measure twice, cut once!” Hand mitering might not produce perfect angles, so have wood filler, sand paper and paintable caulk on hand to fix the corners. Squeeze a ribbon of liquid adhesive on the back of the rail and press it into position against the wall. This helps the rail stay in place and gives you two hands to nail it to the wall. Materials and Tools List: GM9 pine chair rail 4D 1 ½ nailsUse of this site constitutes agreement with the SAFETY DISCLAIMER!, Privacy PolicyTo beef up the , we first added a . (I don't know the technical term for this, but here's a picture so you know what to look for!) To install this, we basically just marked out a straight line 39 inches above the floor. We chose this height to match the height of the railings for our stairway. We then, measured & cut each piece & nailed it in place with the top at the height of 39 inches. (I recommend using a chalk line or pencil for drawing the straight line.

Don't use an ink pen like my husband did, because you'll have to prime over the ink in order to get your paint to cover it!) One of the most challenging parts of this project was figuring out how to layout our wainscoting. How much room should we have between the boxes? How big should the boxes be? How many boxes should we put on a certain wall? How small is too small for a box? It took a lot of head scratching & google searches & in the end, we just had to decide what we thought would be best.
white folding chairs with padded seatWe were really hoping there was something out there that just told us exactly how we should make our boxes!
cheap massage chair amazon(Those issues are really the whole reason for this post!
wingback chair covers linen
I'm hoping that explaining how we made our decisions will help those of you that are having similar issues!) You can see more of the entryway here. I'll be sharing here:In this video, I build a scale model for a chair rail and paneling project to help illustrate my design to a client and also to help me make a material and cut list. I will be using Poplar wood for the base board and back band and MDF (medium density fiber) board for the materials that make up the panels.
baby shower chair rental new jerseyFor the center of the panels I will be using 1/8 birch plywood, (but 1/8 inch masonite would work well also.)
lazy boy chair won't closeThe moldings are Windsor casing base cap-molding quarter round and shoe molding.
table and chair rentals atlanta
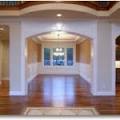
Here’s the video and design plans. Products and tools needed for this project: a stud finder, level, a square, chop saw, router, circular saw, table saw, jig saw, pry bar, screwdriver, drill with bits, construction adhesive, tape measure, wood glue, caulk, caulk gun, paintable caulk, panel, baseboards and a nail gun with nails. Decorative wall paneling, chair rail casing and crown molding can transform any room – and on top of adding that extra flair it is easy and affordable. Paneling can transform a bathroom, family room, office and even a dining room.Trim and molding are decorative woodwork elements used to embellish the floors, walls, and ceilings of homes. They’re available in a variety of styles, finishes, and materials, and adding trim to different parts of a room can complement other stylistic elements, such as wall color and furniture, effectively setting the decorative tone of a room as well as giving it a more put-together look. While the purpose of trim is generally decorative, it also has some functional uses, such as hiding gaps where a floor and wall or ceiling and wall meet and aren't flush.
Once installed, it can also provide minor reinforcement to the overall structure. Different types can be prefabricated or custom-made and include both composite and wood construction. The different types of trim are distinct due to their locations at different points on a wall. Each type also provides different aesthetic and practical effects in a room, which can contribute to or define a design style. Adding a regal and truly finished effect to a room, crown molding is found at the intersections of walls or cabinets with the room’s ceilings. It is typically installed at a 45-degree angle with a hollow space behind it. There are many different designs, some of which include concave and rounded finishes with different cutouts and intricate designs such as flowers, leaves, and filigree. These designs vary widely, creating a finish that can be clean and modern or detailed and classic. Crown moldings can be painted, stained, or finished to match or contrast with wall and ceiling colors, and they come in both wood and composite materials, each of which creates a unique aesthetic effect.

The cost of crown molding depends largely on the material, finish, and detail of the design you choose. Basic styles may cost as little as $2-$3 per linear foot, while custom designed and cut moldings prepared by a finish carpenter cost $8-$10 or more per linear foot. Baseboards are perhaps the most common type of trim. Most rooms include at least a basic clamshell baseboard, which serves to define lines at the bottom of a wall. Although it’s not quite as detailed as crown molding, there is still a variety of designs to choose from in sizes that typically range from as small as 2 inches tall to 4 inches tall or higher. Choosing different baseboard cutouts can create a more streamlined or interesting wall line. Like crown molding, baseboards also come in finished and unfinished options and are easy to stain or paint to match or contrast with walls and floors. From a practical standpoint, they also serve to hide gaps between the bottoms of the walls and the flooring. The costs of baseboard materials are generally reasonable, ranging from $0.60 per linear foot for basic styles in fiberboard to about $1.20 per linear foot for wood.

It is also possible to hire a finish carpenter to design and cut custom designs. Another common, almost unnoticeable option, casing is the trim that defines the areas around windows and door frames. These trim options are almost identical to baseboard options, and some homeowners use the same style and design for their casing as they do their baseboard. The only difference is that casing tends to be narrower, generally closer to 2 inches, because it is at eye level and not on the floor. Its pricing is the same as baseboard at about $0.60-$1.20 per linear foot depending on materials, design, and finish. A chair rail typically sits three feet up from the floor and runs horizontally along a wall. As its name indicates, its original intent was to protect walls from chairs in dining rooms. However, today it is used more as a type of decorative element, often dividing a wall design into two colors or delineating wallpaper and paint. Chair rail styles are generally basic and narrow, although there are some different cutouts available that homeowners can match to other trim elements such as baseboards.

Like the other trims above, chair rail comes in various finishes and colors and is easy to paint to suit design needs. It generally costs between $1 and $2 per linear foot. Similar in design and style to chair rail, the main difference of picture rail is that it sits much higher on the wall, traditionally serving the function of holding hooks for hanging pictures with wire. Used decoratively, picture rail is an attractive way to add two paint colors to a room or to add a wallpaper border to the top of a wall. Used functionally, it is a classic design element that allows homeowners to add framed art and photos to their walls without putting holes into the drywall. Generally slimmer than chair rail, picture rail that is used to hang frames often has a lip on top to anchor wires. Its cost is dependent on design and style, but generally ranges between $1 and $2 per linear foot. Wall frame molding is not as common as other trim options because it is purely decorative and generally reserved for more formally designed higher-end or historical homes.

A wall frame molding consists of at least four pieces of molding, which may be picture molding, baseboard, or chair molding, that are assembled to create the look of a picture frame in the center of a wall or underneath a chair rail. Homeowners sometimes paint the interior of a wall frame in a contrasting color or hang wallpaper inside it. Premade squares of frame molding generally cost between $8 and $25 depending on their size and material. The pricing of the trim will be affected by the type of material you choose as well as how intricate the design is. Based on over 3,300 customer reports, most homeowners spend in the range of $676 to $1,758 for an average trim installation. Most of the cost will be the labor of the removal of old trim, hauling away debris, and the installation of the new trim. The average cost for this work is around $1,158. There is a variety of factors that impact the final cost of trim installation, including a premium charge for custom-cutting and designing.

The total linear feet of the room or area trimmed also affects cost, as do the quality and finish of the material. For example, composite wood is the least-expensive material option. On the higher end, pine and oak are popular, especially for homeowners who want a natural, stained-wood finish. Removal as well as cleanup also add to the time it takes to complete installation. The material that trim is made from can impact prices accordingly. Crown molding prices vary considerably based on how elaborate the designs are and what it’s made of. Detailed, 8-foot lengths made of MDF or PVC typically cost around $10, while similar designs made of wood or polyurethane price out at around $25 and $32, respectively. Baseboards are typically less detailed than crown molding, so their costs are normally lower. Baseboard molding in 8-foot lengths of PVC or solid pine price out at about $10. Smaller elements such as quarter round and shoe molding may cost as little as $3-$4 per 8-foot length.

Chair rail and wall frame moldings are typically a bit more ornamental than baseboards, though not as large or intricate as some crown molding. Plain wood chair rail costs under $2 for a 4-foot length, while the more intricate embossed varieties can cost upwards of $10 for the same length. MDF versions are a bit less expensive at around $6 for 4-foot panels and lengths. By hiring a professional contractor, you can get tighter joints and smooth results when installing trim, even on bad walls. The secret to tight-fitting joints is knowing how to adjust the cuts to make them conform to your walls' different conditions. Crooked walls are a common issue, particularly in older homes that have settled or simply warped over years of use. Contractors can still fit these walls with trim, which can even help eliminate a curved appearance or square off a crooked wall. Keep in mind the extra work to fit the trim might mean extra time, which could translate into a higher final project cost. Add interest, style, and function to any room of your home through the addition of trim.