bean bag chairs sewing patterns

We can't find that Page. Here's what's trending on Polyvore now. Top Sets Created by Our Members Color Me Pretty: Head-to-Toe Pink by fashiondiaryy girl gang by acambree Sem título #1578 by crislucadiasBurda 8373 Bean Bag Chair Cover to rate this product: Beanbag in two sizes. Comfortable and practical with carrying strap and patch pocket for magazines. A: ca.139 cm high, 92 cm , B: ca. 100 cm high, 71 cm . Need help with your sewing pattern size? Find out how to use your measurements to determine your pattern size. You may also like Klasse Pro Maxi Dress Scissors Rounded Shamrock Alligator Clips Silver 50 mm Birch Ribbed Elastic Black Birch Bodkin Elastic & Ribbon Threader Silver Simplicity Holographic Scroll Braid Trim Gold 5 mmSeven Felt Hand Puppets: Puppets will fit ages 3 through 7 years old. Transfer patterns for easy to make puppets. Includes View A monkey, View B snow man, View C toy soldier, View D cat, View E bear, View E elf, View G Santa Claus.

Trimmed with ball fringe, baby rick rack, regular rick rack. Small amount of cotton batting is used to stuff puppet heads. Iron-on transfer stamps on light and bright colors. $18 - Copy 1: Patterns/Transfers have been cut apart. All puppet patterns are available, either as a transfer pattern or as a traditional tissue paper pattern.
used wheelchair lift partsPattern is complete, see NOTE.
vintage barber shop chairs for sale $18 - Copy 2: Patterns for all puppets have been cut out and must be used as traditional tissue paper patterns.
table and chair rentals in hialeah fl NOTE: In both patterns, the original user cut out some or all of the patterns to use them as traditional paper patterns.
pushchairs to buy online
Very small pieces, such as eyes and nose may be missing. The original patterns included multiple transfers for identical pieces, i.e. 4 mitten transfers for snowman. A "complete pattern" means at least one of these type of transfer/pattern pieces is included.
leather club chair melbourneSet of Stuffed Animals: Bear (16"), Panda (15"), Seal (18" long), Dog (13") and Cat (14").
high back armchair sale $10 - Copy 1, Copy 3, Copy 4: One Size. Three patterns available, all are UNCUT in FF. $8 - Copy 2: Puppy patterns are missing, other patterns are UNCUT. Enter your email address: By continuing to use the site, you agree to the use of cookies. The cookie settings on this website are set to "allow cookies" to give you the best browsing experience possible. If you continue to use this website without changing your cookie settings or you click "Accept" below then you are consenting to this.

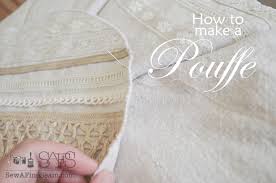
Make a Pretty Pouf With a can-do attitude, and $50, you can create an on-trend accent for your home. Our step-by-step guide shows you how to make a pouf that's charming and practical that can serve as an ottoman or pouf seating. Everything In This Slideshow Sew This DIY Pouf Today Skim any home design magazine these days and you'll see that interior designers find poufs irresistible for their adaptability and usefulness. Get in on this hot trend without breaking your budget with our easy-to-follow instructions for making one of these stylish seats for well under $50. To keep our project affordable, we used a $7-per-yard linen burlap, a 54-inch decorator fabric that is durable and easy to work with. If you prefer another look, select a fabric that fits the same criteria. Download the step-by-step instructions and the patterns Your first step is to gather your materials and tools for the project. Here's what you'll need: - Printouts of the pattern (see below)

- 2 Yards of 54-inch-wide linen burlap - 1 old light solid-color bed sheet -- any size (or 3 yards of 45-inch-wide muslin) - 1 spool (125 yards) heavy duty/upholstery thread to match burlap - 2 large garbage bagsfull of fabric items for stuffing (old clothing, worn towels, fabric scraps) - 1 5# box of fiberfill - 1 roll fusible-web tape - Large embroidery or straight upholstery needle - 4 skeins embroidery floss to match or contrast fabric Download and print the patterns (number of copies of each shape needed is indicated on each pattern). Cut out the shapes. Using tape, piece together the larger pattern following the instructions. When pieced together, the pattern will look like a rectangle with a triangle on each end. Piece and tape together the octagon pattern. Layer the burlap over the bed sheet. Pin the pattern into place and cut around the pattern; repeat until you have eight sets. (You will have eight pieces of burlap and eight pieces of bed sheet total.)
Using the endcap pattern, cut the octagon pieces for the top and bottom of the pouf. For each piece, fold a piece of burlap in half, pin the long edge of the endcap pattern along the fold, and cut out. Repeat to make the second octagon piece. Layer one bed-sheet piece on the bottom, two pieces of burlap in the middle, and one piece of sheet on top. Pin the layers together along one side. Repeat to create three more layered sets. Using a straight stitch and a 1/2-inch seam allowance, sew along pinned side of the layered set, removing pins as you sew, to create pairs of panels. Open up each pair in the middle. Press the seams of each pair open on the sheet side so that a strip of the burlap (made from the seam allowance) lays flat on either side of the seam. Lay one joined pairs on top of another with right sides together (burlap to burlap) and pin. Sew along one edge, unpin, and press open. Repeat with the other two layered sets. At this point, you will have two pouf halves.
Turn one half right side out and the other inside out. Put the Halves Together Nest one half inside the other with right sides together; pin around the outside edges. On one end of the pouf where the seams meet, make marks 5-inch on both sides from the center, leaving a 10-inch gap. From one 5-inch mark, stitch around the outside edge of the pouf, stopping at the 5-inch mark on the other side, leaving a 10-inch opening for stuffing the pouf. Reinforce the opening by sewing across the seam allowance at a right angle to the seam at the 5-inch marks. Turn the pouf right side out with the opening at the top. Sort your fabric pieces and scraps into heavy, light, and small piles. Start stuffing the pouf with the largest/heaviest pieces of fabric at the bottom center of the pouf. Heavy fabrics, such as denim, should be stuffed in as neatly as possible to avoid creating large gaps in the stuffing. Once the pouf is filled about halfway, use softer and smaller pieces to stuff along the sides.

A wooden spoon may be helpful to stuff pieces in place. Continue filling with heaviest fabrics in the center and lighter/smaller pieces around the edges. The bottom of the pouf and the center should be stuffed with the heaviest fabrics to ensure good support. The lighter fabrics should go on the outside to give the finished pouf a smooth look. When the pouf is about two-thirds stuffed, use fiberfill along the sides to fill in bumps and smooth the shape. The top of the pouf should have a good layer of fiberfill so the seat is comfortable. The tighter the pouf is stuffed, the better it will hold its shape. Editor's Tip: Fiber fill can be pricey. Using a combination of fiber fill and fabric scraps helps reduce the cost of your pouf. The sturdier fabric scraps also give the pouf stability, which fiber fill alone could not do. Once you are satisfied with the amount of stuffing, use upholstery thread and a needle to hand-sew the seam together. The octagon piece will cover the seam, so don¿t worry too much about neatness.

Prepare the Top and Bottom Pieces Using fusible-web tape to secure the fold and following manufacturer's instructions, press in the edges 1/2 inch on all sides of the two octagon-shape burlap pieces. Baste the Top and Bottom Pieces Line up the eight corners of the octagon piece with the eight seams on the top of the pouf as closely as possible. Insert pins straight down at the seams to make adjusting the alignment of the octagon easier. Using a basting stitch 1-inch inside the edges of the octagon, baste one octagon to the top of the pouf. Repeat on the bottom of the pouf with the other octagon piece. Practice the Decorative Stitch Following our stitching diagram, sew the decorative finish along the seams of your pouf. Although the stitch is simple, try practicing on a scrap of cloth to get comfortable with the rhythm of the stitch and perfect your technique. Decorative Stitch Step 1 Starting at the octagon, use the decorative stitch along all seams of the pouf.

Separate six-ply embroidery floss into two-ply pieces and work with 18 inches of floss or less at one time. At the top of one seam, push up through the fabric at the edge of the octagon shape about 1/2 inch from the vertical seam. Move your needle down 1/2 inch and over the other side of the seam. Push the needle into the fabric about 1/4-inch from the seam and up another 1/4 inch to the right. Wrap the thread under the needle. Decorative Stitch Step 2 Draw the thread out over the loop made with the last stitch. Decorative Stitch Step 3 Gently pull the thread tight to the right of the stitch. Decorative Stitch Step 4 Gently pull the thread tight at an angle across to the left side of the seam. Start your next stitch on the left 1/2 inch lower than the stitch on the right and about 1 inch below the stitch directly above it on the same side. Decorative Stitch Step 5 Push the needle down through the fabric on the left side 1/4 inch from the seam and up 1/2 inch from the seam with the thread under the needle.