bean bag chair child pattern

Create extra seating wherever you want by making a soft, squishy, super-comfy beanbag. Our beanbag sewing pattern gives sizes for adults or children. Our adult's and child's beanbags are made with a removable outer fabric cover for easy washing or dry cleaning. Instructions are given for adult/child sizes. You will need: 1.6m/1.2m 140cm-wide furnishing fabric 1.6m/1.2m fire-retardant lining fabric approximately 5cu ft/3cu ft polybeads How to make the beanbag 1. Stitch the seams with the right sides of fabric together and take 1.5cm seam allowances. 2. Following the relevant cutting diagram for the adult or child size (see below), cut out the fabric and the lining - omit the strap piece when you're making the lining. 3. Fold the fabric strap in half and stitch down the long side. Turn right side out and press. Lay the strap across the top and tack at the edges. Press under 2cm across straight edges of the base. Pin and stitch the side edges of the sides together.

Insert the lining inside the outer cover. All measurements in the cutting diagram are in centimetres. Why making your own clothes is back in fashion How to make your own kimono Video: How to hem Video: How to pin and cut Amazing haberdasheries around the UK you have to explore John Lewis has 'no plans' to close down haberdashery department How to make your own advent calendar How to make your own Little Black Dress Make your own trench coat with this free pattern How to make vintage-style tablecloths and napkinsмастер-класс (+1) сообщ - Кресло мешок своими руками | Easy self draft bean bag pattern with great instructions. No messy PDF printing involved! Owl Quilt Pattern | if you liked this pattern you may also enjoy my tutorial and pattern ... bean bag tutorial... for the one who prefer custom stuff... like me :) Free pattern and tutorial: Baby and toddler bean bag | Bean bags can be used to promote so many areas of development!

Learn how to make these no-sew bean bags in just a few minutes ... plus learn lots of bean bag activities you can do with kids to develop skills like hand-eye coordination, core strength, body awareness, and more! Bean Bag Chair - free sewing pattern. These are great for playrooms or just hanging out with the family on the deck or porch! How to Make a Pyramid Beanbag Chair This project is perfect for a beginner sewer to take her skills to the next level by inserting a zipper. Using leftover fabric scraps and polyester stuffing instead of the usual bean bag beans, it's also very affordable. Because the chair is just a rectangle, the size is easily adaptable for children or adults. Super easy to wash, too! Crochet Chicken Pattern ... Little Chick Bean Bag Pattern Crochet Chicken Pattern ... Little Chick Bean Bag Pattern | Bean Bag Chair Pattern to Help You Relax in Style Instructions to make my girl her very own bean bag for my apartment lol. It will have the initials G.E.T. :)

DIY: Sew a Kids Bean Bag Chair in 30 Minutes Make a bean bag chair that’s as unique as your child. With just two pieces of fabric, a zipper, and a straight stitch, you can create a kid’s bean bag chair in just 30 minutes. It makes the perfect spot for lounging or curling up with a good book, and it’s just the right size for your little one. , plus baby essentials, exclusive brand offers, and more. Burda bean bag pattern #8373 Своими руками puf MásLittle Chick Bean Bag Pattern - Petals to Picots Child Size Bean Bag Chair -DIY Video Tutorial - Crafty GeminiGiant Bean Bag Chair Tutorial Giant Bean Bag Chair Tutorial; DIY foam filled lounger with complete sewing instructions. These are SO comfy, and so much cheaper to make yourself! 5 Comfy DIY Bean Bags Bean bags are perfect extra seats in your home. They are portable and very comfy too. Make your own bean bags that are perfect for kids and even adults too. 1. Super Simple DIY Kids Bean Bag Chair YOU WILL NEED: Two (2) pieces upholstery fabric (32” x 45”) One (1) 22” zipper One 3.5…
мастер-класс (+1) сообщ - Кресло мешок своими руками | How to Build a Regulation Cornhole Set corn hole instructions Giant DIY Floor Pillows Giant DIY Floor Pillows | // How to Sew Your Own Bean Bags {Tutorial}. A great project for beginners, making bean bags is quite simple and kids of all ages will love them! How to make a Pouffe Tutorial from Sew a Fine Seam on making a pouffe pouf handmade bean bag ottoman Своими руками ШЬЕМ САМИ УДОБНОЕ КРЕСЛО МЕШОК. Learn how to make these 5-minute DIY no-sew bean bags ... plus learn lots of ideas for fun, developmental bean bag activities! DIY Beanbag Chickens Crochet Beanbag Chicken Um das Kinderzimmer der wilden Dame zu verhübschen habe ich ihr zwei schöne Sitzkissen nach der Anleitung von StraightGrain genäht. Summertime is nearly upon us, which, for many, means kids out of school. This is such a fun time of year – lots of activities to fill their days with.
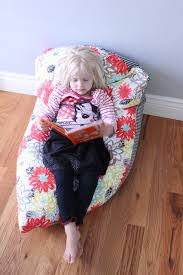
But kids need leisure and “down” time just as much as they need stimulation and exercise, which makes this super simple DIY bean bag chair a must-do in these late spring months. If you have about 45 minutes or less and can sew a zipper, you’re more than equipped to tackle this quick project that will give your kids the perfect relaxation domain. They might even take a nap here. If you were on the fence about this DIY project before, you’re interested now, aren’t you? Note: For your reference, the child in the photos above is 3’ tall. Feel free to adjust your own bean bag’s size accordingly to best fit your child(ren). Step 1: Lay out fabric right sides together. You can choose two pieces of fabric that are the same, or you can choose to contrast the two pieces. Either way, it’s recommended that you choose an upholstery weight fabric for best results and durability. Step 2: Cut fabric to size. Each piece should be 32” x 45”. Prepare to sew both of the 45” sides together.

Step 3: Sew the longer (45”) raw edges together. Make sure right sides of fabric are touching each other (facing in), and use a fairly small straight stitch at 5/8” seam line down both 45” sides. Tip: The smaller the stitch size, the more durable your seam tends to be. I went ahead and did a double seam to improve durability, but that’s not required. Use a zigzag stitch on the raw edges of your two new seam lines (down the 45” edges) to keep the fabric from fraying over time. Step 4: Lay out and fold fabric. Fold fabric “hot dog”-style, so that your two 45” seams touch each other. Step 5: Round the corners. Beginning at the fold, cut a slow arc in your fabric toward the seam lines, aiming for a total of about 6” width off the seam edge. When you unfold your pieces, you should be left with a symmetrical curve at one end. Adjust and/or trim the curve so that it makes you happy. Step 6: Sew the curved edge closed. Using the same methods that you used previously (such as small stitch size at 5/8”, with a single or double seam, and zigzagged raw edge), sew the curved edge closed.

Step 7: Prepare for zipper. At this point, you should only have one opening on your piece; the other three ends should be sewn together. Lay your fabric down on a flat surface. Roll your piece until the two 45” seam edges match up. This puts folds in the middles of your two fabric pieces. Open your zipper most of the way and place one side (zipper should be face-down) near the edge of your fabric. (Don’t worry about the other half of your zipper at this point; we’ll get to that later.) Pin this one side of the zipper in place, from one end of the zipper to the other. Using a zipper foot on your sewing machine, carefully sew the zipper half into place. Lay your fabric back down on the flat surface and carefully pin the other half of the zipper onto the other side of your bean bag chair fabric. Sew this side into place. Tip: If your zipper foot can’t sew around the zipper pull, simply sew up to it then lift your sewing machine foot and move the zipper pull up or down the zipper, then lower your sewing machine foot and continue your zipper seam.

Step 8: Close off top and bottom of zipper. Although they come with built-in stoppers, it’s helpful to secure the ends of your zipper with a seam or two so that the zipper stays intact over time. Before you finish things off, though, make sure your zipper is at least partly open so you can turn your fabric inside out when complete! At one edge of the zipper, with the fabric folded together, sew a perpendicular seam over the edge of the zipper and then continue the seam toward the fold in your fabric. (This seam will only be about 5” long.) Repeat on the other end of your zipper. Tip: Curve the end of your seam toward the fold just a bit, only an inch or two, to soften the corner. Step 9: Finish off the raw edges by your zipper with a zigzag stitch. Step 10: Fill bean bag chair with “beans.” Turn your bean bag right-side out, fluff out the corners, and begin to fill with the foam beans. These things are static, so I found it most effective to cut a 6” hole in the plastic sack, stick the whole thing down inside my sewn bean bag chair, and work the beans out that way.