baby bean bag chair sewing pattern

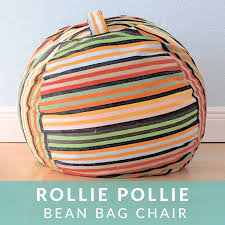
Shop unique and handmade items directly from creative people around the worldRollie Pollie, bean bag chair Meet the Rollie Pollie. It’s a chair, it’s a toy, it’s your favorite pillow! This PDF pattern combines colorful photos and illustrations with detailed instructions for sewing a Rollie Pollie bean bag chair. • Easy-to-follow instructions for the intermediate sewer • Tons of info about Fabric selection, sewing with zippers, and filling • Links and info about where to buy the right stuffing for your Rollie Pollie • How-to make an Insert Rollie Pollie, and a slip-cover to go over it (easy to wash!) • TWO different Child’s Pattern sizes to choose from (both are included) Small – best for 1-2 year olds Large – best for 2-6 year olds + (from one side of the rollie, half-way around, in a semi circle to the other side) Small – 38 x 38 inches Large – 50 x 50 inches Fabric/Stuffing needs are explained in the pattern but to give an overview, you need:
• 2-4 yards of fabric for the Insert Rollie Pollie • 2-4 yards of fabric for the Slip Cover Rollie Pollie • 4-10 bags of stuffing or other filling. DOWNLOAD and PRINTING DETAILS • This is a 42-page PDF downloadable document – You are NOT mailed a physical paper pattern.
chaise lounge chair nz • After purchase you will receive an email with download instructions.
cheap modern glider chair PLEASE SAVE the Document to your COMPUTER (rather than a mobile device) then you will always have it—because your download link will expire at some point.
herman miller chair weight limit • The file size is 8.3 MB
table and chair rentals in dallas ga
• You do not need to print every page. • Pages print to 8 1/2 x 11 inch paper • By purchasing this pattern, you are free to make bean bag chairs from the pattern and sell them in your small-scale shop, such as an etsy shop, or for a local fundraising event.
stair chair lift systemsNo production license needed.
cheap chair and table hire auckland • NO mass production please. • If you ever have someone manufacture products or garments for you, you will need to create your own pattern. TAG YOUR PHOTOS ON INSTAGRAM: #rolliepollieMADE + @madeeveryday I was dashing through Lincraft a couple of months before Christmas last year when some fabric caught my eye that I thought would make great beanbags for our four oldest grandchildren. When I couldn't find a pattern to follow I drew one up that, (surprisingly, but one of those really nice surprises! :) worked really well.

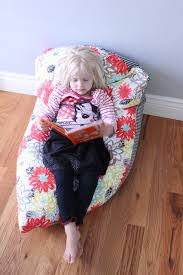
I wanted to make the old-style tear-drop bean-bag shape that mimics a chair when you sit on it - and not the plain square or round cushions. (You can see how to make a square bean-bag cushion .) On Christmas day each child received their beanbag and they spent the rest of the afternoon jumping around on them - they loved them!. I already have orders for two more for next Christmas :) You'll need about 3 meters of some medium to heavier-weight fabric for each outer cover. - (Six panels x 40cm x 91cm, plus a 51cm square piece for the bottom circle. I originally bought two and a half metres (of 120 or 135cm wide), for each beanbag, and had to go back for more fabric. Three metres of fabric should be just right.) You'll also need 3 metres of a strong lining fabric for each inner beanbag. (I used an inexpensive poly-cotton.) Sewing cotton to match your outer cover, (since you will be top-stitching and it will be obvious)

A medium to heavy-weight zip ( is easy)(I used about 115 litres for each bag) Some tissue paper or similar, to draw up your pattern. (I used cheap $1 tissue paper I had at home. It doesn't matter what paper you use.) Draw up your pattern, using the guide below (Diagram 1). You can call this Pattern Piece 1. (I drew this up free-hand. You should be able to copy it successfully by following the diagram I think. The pattern already incorporates a 1.5cm hem allowance. If you click on the image it will enlarge.) Next, draw up a pattern for your bottom circle piece, by folding a piece of tissue paper in half, and marking 25.5cm from a middle point, in an arc to form a half circle. Open the tissue out, mark the centre line of the half-circle, then add a 1.5cm seam allowance just along the centre seam (the outside of the half-circle already has a 1.5cm seam allowance). Cut out and call this Pattern Piece 2. Cut 6 beanbag panels from outer fabric, of Pattern Piece 1.
(That you can see above, in Diagram 1.) Also cut 6 beanbag panels from lining fabric, of Pattern Piece 1. (I ironed, then layered and pinned the six panels to cut them all out together - as you can see above, to save time.) Cut 1 Pattern Piece 2 of the outer fabric, on the fold, then separate, to give you two identical pieces. Cut 1 Pattern Piece 2 of inner lining fabric, on the fold, then separate the pieces. Sew all of the side panels together at the long sides, then top-stitch each seam as you go for added strength, catching in the hem underneath. When all of your side panels are assembled, the tip of the beanbag should look something like this: (If your seam lines don't all meet perfectly in the middle, you can hand-sew a few stitches to bring the seams together to a neat point, and strengthen the junction.) Join the two side pieces of outer fabric Pattern Piece 2 with your zip. You can see how to sew in the zip .) Ease-stitch 1cm in from the outside of the circle made by your two joined pieces of Pattern Piece 2, then pin and stitch this bottom circle to the joined top side panels.

Topstitch this seam and clip the curve as needed. You now have your outer bag all finished :) Basically, follow these same directions to sew up the inner lining pieces too. The only difference will be that you will not sew in a zip. Instead, sew the two halves together but leave a 25cm opening (through which to fill with beans). Put the lining bag inside your outer bag before you fill the bag with beans. (I found this out by not doing so, and having an unnecessarily hilarious time trying to get the fat, filled little beanbag through the too-small zip opening of the outer bag. I possibly ought to have made the bottom circle piece a little larger, but in every other way it worked well so I thought... nope :) Fill the inner bag with beans. (I won't try to direct how you accomplish this. With lots of laughter, a second pair of hands to help, frequent looks of astonishment that indicate your bemusement that such little beans can be so very lively, and, one hopes, a good vacuum to finish, is my guess.